I am currently working on a project that requires to transfer the values from one virtual directory to another. In ASP.NET 1.X I used the technique of transfering the GUID of the user and later retrieving the user information based on the GUID of the User. You can view the technique at Maintaining Session Between Applications. In this article I will show you that how you can use the Profile class to pass the values from one web application to another.
Introduction:
I am currently working on a project that requires to transfer the values from one virtual directory to another. In ASP.NET 1.X I used the technique of transfering the GUID of the user and later retrieving the user information based on the GUID of the User. You can view the technique at Maintaining Session Between Applications. In this article I will show you that how you can use the Profile class to pass the values from one web application to another.
Creating Profile Tables, Stored Procedures, Roles and Views:
The first thing that you need to do is to configure your database so that it can hold the Profiles for the users. You can easily configure this using the command line tool called "aspnet_regsql". Simply, open the Visual Studio.NET 2005 command prompt and enter aspnet_regsql.exe this will open a wizard which will guide you through the steps. After all the steps are completed successfully you will notice that there are various new tables, stored procedures, views and roles created in your database. All these new elements were created when you ran aspnet_regsql utility.
Setting up the project:
The first thing that you need to do is to add a blank solution and add two web application projects to it. First web application project is called TestApp1 and the second one is called TestApp2. Set the authentication mode to Forms, this is done by simply setting the mode in the authentication section to "Forms" in the web.config file (The default mode of authentication is Windows).
Setting up the User Interface:
The User Interface of this application is created in TestApp1. Let's view the simple User Interface below:
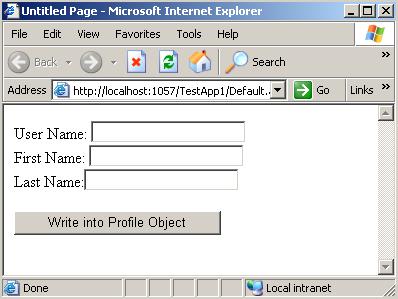
As, you can see in the image above that I am simply taking User Name, First Name and the Last Name as input. Now, let's delve into the details and see how this is working.
Configuring Profile Object in Web.config:
Before you do anything with the profile object you need to set it up in the web.config file. Here are the configuration settings defined for my Profile object in web.config file:
| <connectionStrings> <add name="ConnectionString" connectionString="Server=localhost;Database=MyDatabase;Trusted_Connection=true"/> </connectionStrings> <system.web> <!-- PROFILE CONFIGURATION --> <profile defaultProvider="MyProfileProvider"> <providers> <add name="MyProfileProvider" type="System.Web.Profile.SqlProfileProvider" connectionStringName="ConnectionString" applicationName="MyApplication"/> </providers> <properties> <clear/> <add name="FirstName"/> <add name="LastName"/> </properties> </profile> |
As, you can see that I have first defined the connectionString and then the profile settings. One thing that you should notice is that I am using the applicationName in the profile configuration. The attribute applicationName denotes that this profile will be used for this particular application and is recognized by the name "MyApplication". If two of you web applications have web.config and uses the same applicationName then it means that the profile object will be shared between two applications.
THE CODE:
Now, let's see the code of the Button click event which authenticates the user.
|
protected
void Button1_Click(object
sender, EventArgs
e) { FormsAuthentication.SetAuthCookie(txtUserName.Text, false); Response.Cookies.Add(new HttpCookie("FirstName", txtFirstName.Text)); Response.Cookies.Add(new HttpCookie("LastName", txtLastName.Text)); Response.Redirect(Request.ApplicationPath);
} |
In the button click event I authenticate the user and set the user cookie. I saves the First Name and the Last Name in the cookie so I can later assign it to the Profile Object. Response.Redirect will load the page again and it will fire the Page_Load event.
|
protected
void Page_Load(object
sender, EventArgs
e) { if (Request.IsAuthenticated) { // Write the information into the Profile object Profile.FirstName = HttpContext.Current.Request.Cookies["FirstName"].Value; Profile.LastName = HttpContext.Current.Request.Cookies["LastName"].Value; Response.Redirect("http://localhost:1059/TestApp2/Default.aspx"); } } |
The userName is assigned to the cookie in the Global.asax file as I have shown below:
| void
Application_AuthenticateRequest(object sender, EventArgs e) { if (Request.IsAuthenticated) { // Set the cookie here Response.Cookies.Add(new HttpCookie("UserName", User.Identity.Name)); // Do whatever ..... } }
|
| The technique that I have demonstrated might not be practical since you are saving the information in the cookie and later assigning the values from the cookie to the profile object. Profile object should be assigned only when the user is authenticated. In the code above I am doing authentication and assignment at the same time. |
You must be wondering that why did I made a User Name cookie. This is created so I can transfer the User Name to the next application and on the basis of the User Name I can retrieve the user's profile from the database.
| If you are using the Windows authentications instead of the Forms authentication then you don't need to pass the cookie since you will be using your windows account to authenticate the user and you will be automatically authenticated in the other application. |
Now, let's see the second application code which receives the User Name and gets the profile from the database.
|
protected
void Page_Load(object
sender, EventArgs
e) { if (!Page.IsPostBack) { string userName = String.Empty; string firstName = String.Empty; string lastName = String.Empty; // Get the cookie if (Request.Cookies["UserName"] != null && Request.Cookies["UserName"].Value.Length > 0) { userName = Request.Cookies["UserName"].Value; // Get the profile based on userName ProfileCommon userProfile = Profile.GetProfile(userName); firstName = userProfile.FirstName; lastName = userProfile.LastName; } Label1.Text = userName + ":" + lastName + ":" + firstName; } } |
As, you can see in the above code that I am retrieving the User Name from the cookies collection and used that User Name to get the complete profile of the user. Now, you can use the profile in a different application. Also note that you need to use same profile settings in web.config for the TestApp2 which you used for TestApp1. The connection string must also be same since you configured "MyDatabase" to store the profile.
Conclusion:
As, you saw in this article that how you can pass the values from one virtual directory to another. I think what would be great is that if you can pass the profile without using the cookie to store the user name. According to the Microsoft documentation you only require the application name to be same to pass the profile object. Unfortunately, this only works for windows authentication.
Please feel free to download the the source code at the end of this article.
I hope you liked the article! happy coding.