This will be a long series of articles in which we will migrate an existing HighOnCoding webforms application to an ASP.NET MVC application. We hope to cover every aspect of building a MVC application using agile techniques. All the code is available on Google Code and can be downloaded at http://code.google.com/p/highoncoding/. Please note that code will be updated throughout the series.
What Will You Learn From This Series?
This series will be a learning experiece from both the sides. The readers and the series authors will learn about writing clean code, dependency injection, ASP.NET MVC Framework, Routing, Test Driven Development, Build Automation, Agile Management Tools, Source Control Systems etc.
Why MVC?
Like many other articles and blog posts we will not start bashing at the ASP.NET Webforms modal. We believe that Webforms was a great step forward from the classic ASP and many great applications were build using the ASP.NET Webforms modal. ASP.NET MVC framework is different from webforms since it is designed with testability in mind. ASP.NET MVC framework also lets the developer to layer the application in a cleaner way. Let's get started.
Creating an ASP.NET MVC Application:
If you are using an older version of ASP.NET MVC Framework then please upgrade to the Version 1. You can download the V1 of ASP.NET MVC using the URL given below:
http://www.asp.net/mvc/
Once, you have installed the MVC Framework open your Visual Studio 2008 and create a new ASP.NET MVC Web Application as shown in the screenshot below:
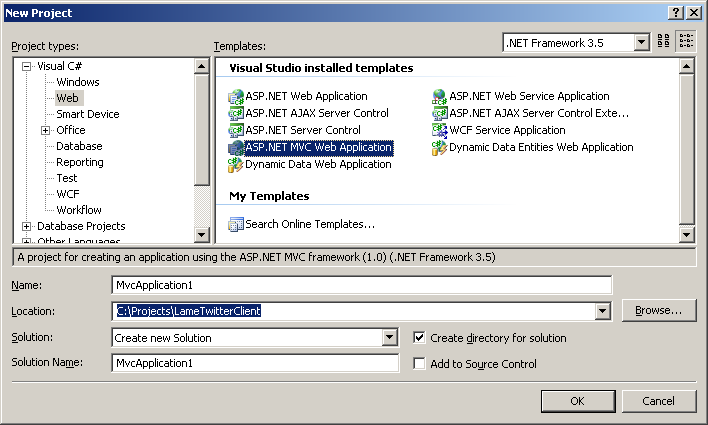
The next screen will allow you to select a testing framework. Select the unit testing framework that you desire to use. We will using MbUnit framework to run our unit tests.
After the unit testing framework selection Visual Studio will create a default template of the MVC application. You will notice that VS creates a different directory structure for the ASP.NET MVC project template. Let's take a look at the directory structure a little closer.
Content: This folder contains all the styling documents which includes CSS, Themes etc.
Controllers: This folder contains all the controllers which will be responsible for rendering the view.
Images: This folder will contain the images used by the application
Models: This folder is suppose to hold the model of the application. Model represents the underlying data model of the application which can be represented by Linq to Sql, Entity Framework, NHibernate, DataSets etc. We will not be using this folder to hold our model. Our model will be placed in a separate project so that it is easier to test the model.
Scripts: The scripts folder is used to hold the client side script files.
Views: The view folder is used to hold the user interface for the web pages.
Setting Up the Project Structure:
Our project structure is pretty straight forward. We have three projects in our solution as shown in the screenshot below:
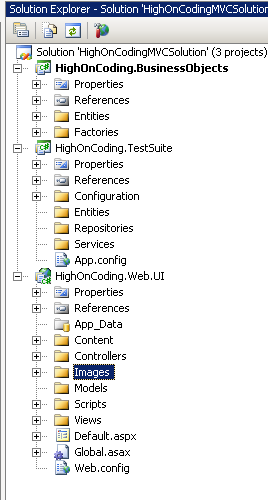
The HighOnCoding.Web.UI is the actual ASP.NET MVC Application. HighOnCoding.BusinessObjects is where the model resides and HighOnCoding.TestSuite is where all the unit tests will be stored.
Everything is well organized in folders. Even the unit tests are organized into folders. This will make it easier to find out which part of the application is being tested.
The next step is to import all the images, styles and the master pages from the old HighOnCoding webforms application to the new HighOnCoding MVC Application.
Importing Styles, Images, Master Pages:
Importing styles and images is not a big deal since you only have to copy and paste them into the right location. Images will go in the Images folder and style should go in the Content folder.
Finally, add the master page into the project inside the Views/Shared folder of the HighOnCoding.Web.UI project. There are couple of ways of hooking up the master pages. You can import all the user controls into the project and then remove the code behind logic from them. We have discarded that approach since we have many user controls and the code behind of user controls is accessing the data layer. We will create the user controls from scratch. Pull out all the user controls from the master page and replace them with the markers which states what user control was placed at that place. Once you are done you will have the following structure of the application.
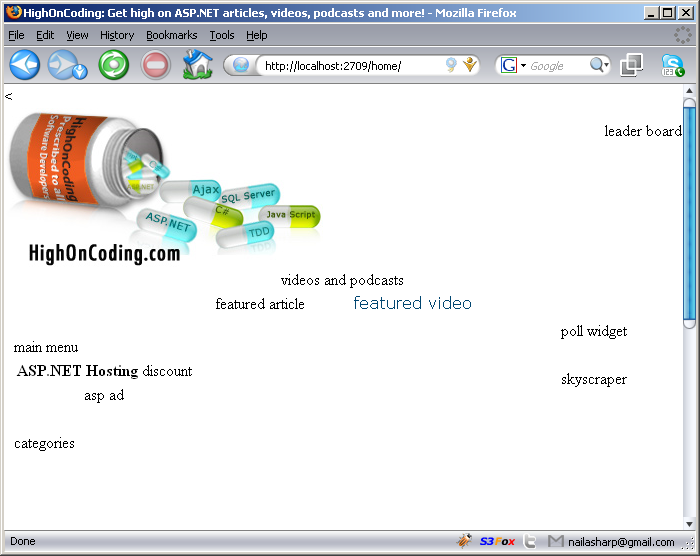
The screenshot above shows that we have removed all the user controls from the master page and are left with the skeleton of the application. The place holders will play a vital part when we are putting controls back on the master page.
Adding References to the Required Libraries:
We will be adding references to the required third party libraries throughout the development of the application but here are few third party libraries to get started.
MbUnit
Rhino Mocks
Test Driven.NET (AddOn to Visual Studio)
Fluent NHibernate
Conclusion:
In this article we got started with the HighOnCoding MVC application which is a migration from the Webforms framework. In later articles we are going to proceed with the migration and learn new things along the way.
[Download Source]