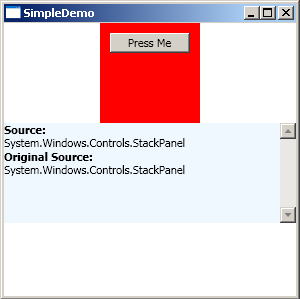
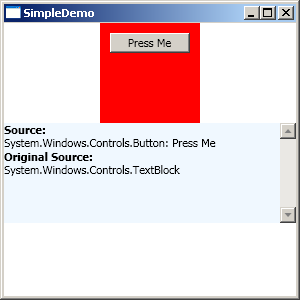
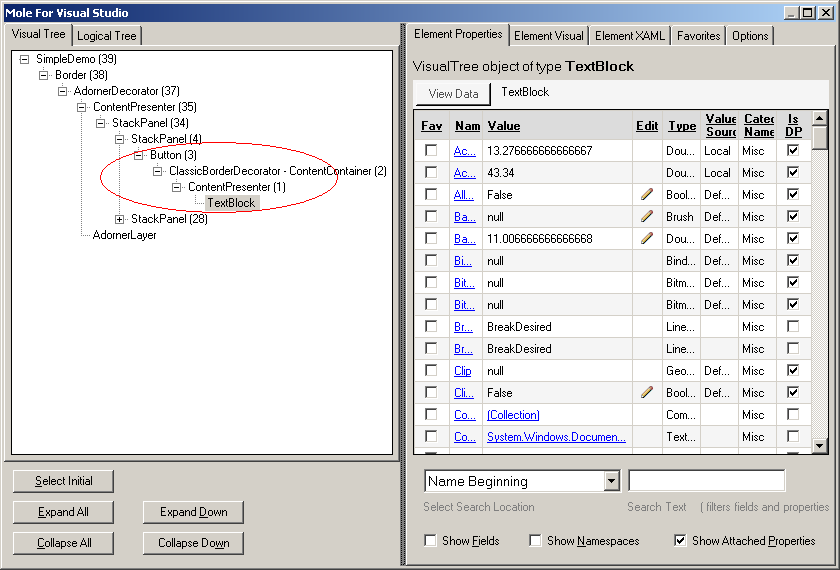
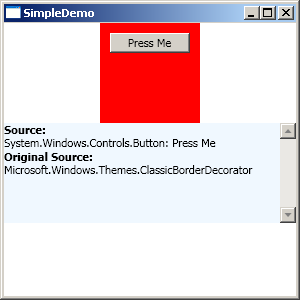
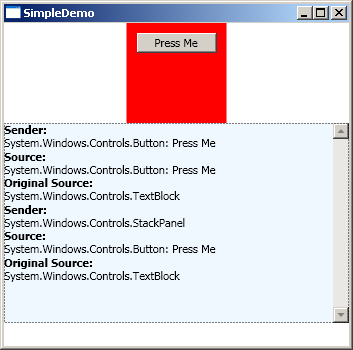
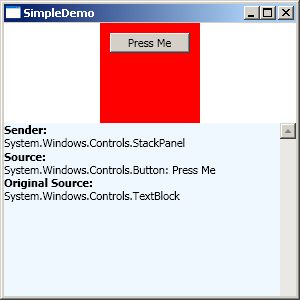
Windows Presentation Foundation event handling structure is quite different from Windows Forms and ASP.NET Framework. WPF consists of bubbled events, tunneled events and direct events which are also called CLR events. In this article we are going to explain the differences between these type of events.

Types of Events:

There are three types of events in Windows Presentation Foundation.

1) Bubbled Events: Bubbled events are bubbled upwards from the triggered control. This means that if you trigger the event on a Button control which is contained inside the StackPanel then it will first fire on the Button control and then on the StackPanel control and then on the next outer control.

2) Tunneled Events: Tunneled events work in the opposite direction which means they go inwards instead of outwards. This means if you fire a tunneled event on a StackPanel then it will be fired on the StackPanel first and then on the control inside the StackPanel and so on. Tunneled events always start with Preview keyword.

3) Direct Events/CLR Events: These are plain CLR events which we all are used to in .NET environment.

Understanding Bubbled Events in WPF:

Let's take a closer look at the routed bubbled events. We have created a very simple interface which consists of StackPanels and ItemsControl. The purpose of the ItemsControls is to show the triggered events. Here is the code:


The first StackPanel inside the "parentStackPanel" is called "myStackPanel". The StackPanel is hooked up with "MouseRightButtonDown" event. This means that the event will be fired whenever we press the right mouse button. We have also created a simple generic handler which will capture this event. Here is the handler code:


The _eventSources is an ObservableCollection<SourceInformation> which holds the information about the triggered events and the source objects. A property EventSources is exposed as the public property on the Window element as shown below:


On the XAML side the ItemsControl is used to display the events.


Now, when you run the application and right click on the StackPanel you will see the following:


The screenshot above shows that both the Source and Original Source is StackPanel. Keep in mind that we did not click on the button but we clicked the red area of the StackPanel control.

You might be wondering that what is the difference between the source and the original source. Let's click on the button control (MouseRightButtonDown) and you will have a better idea about the Source and OriginalSource properties.


In the above screenshot our Source and OriginalSource properties are different. The Source is "Button" but the OriginalSource represents the TextBlock element. Don't get confused the reason is pretty simple!

A Button is made up of many different elements. The best way to look at the structure of the Button control or any other control is to use the Mole Visual Studio Debugger Visualizer. Here is the screenshot showing the Button control in detail.


As, the above screenshot shows the Button control consists of three other controls in which TextBlock is one of them. The TextBlock control is invoked because we clicked on the Text of the Button control. If we click on the gray area of the Button control then the OriginalSource will be ClassicBorderDecorator as shown below:


But wait!

How is the Button sending the events when there is no event handler hooked up to the Button control? The anwer is that Button is not sending any events to anyone! It is the StackPanel control which is raising the events. You can easily view this information by checking the value in the sender object of the "Generic_MouseRightButtonDown" event.

If our Button also handled the MouseRightButtonDown event then you will see a different output. Let's attach the event to the Button control.


Now, if you perform a MouseRightButtonDown on the Button you will see the following result:


We have added the "Sender" property to the result which clearly shows that the event is fired by both the Button control and the StackPanel control.

The example above demonstrated the use of Bubbled events. Let's take a look at the Tunneled events.

Understanding Tunneled Events in WPF:

As, we pointed out earlier that bubbled events go outward from the origin and the tunneled events go inwards from the origin. The tunneled events start with "Preview" keyword as shown below:


We have added the tunneled event on the StackPanel. Now run the application and click perform a MouseRightButtonDown event on the Button control.


As, you can see in the above screenshot the tunneled event was fired first on the StackPanel.

If you like you can also cancel all the other events from being fired by setting the e.Handled flag to true as shown below:


The screenshot below shows that only the tunneled event (Preview) was fired and all other events were cancelled.


This technique for killing all the events can be applied to both the bubbled and tunneled events.

Visualizing the Events:

In the above scenario we are using a simple ItemsControl to view the fired events. Although it serves the purpose but we need more visual aid to actually see it happening. Take a look at the animation below which shows each event as it is being fired.


We believe that the above application will provide help to beginners for understanding events in Windows Presentation Foundation.

Conclusion:

In this article we learned about different kinds of events in Windows Presentation Foundation. In the next article we will explain the workings of the visualization application and how it was implemented.

[Download Sample]