Dialog boxes are frequently used in web applications to provide additonal information to the user. Dialog boxes are not hard to create but creating attractive draggable and stretchable dialog boxes is hard. In this article we are going to demonstrate how to use JQuery UI library to create attractive dialog boxes.
Downloading JQuery and JQuery UI:
The first step is to download the latest version of the JQuery framework along with the JQuery UI library which contains the dialog box along with other cool plug ins. You can download the associated libraries using the following URL:
1) JQuery
2) JQuery UI Library
Add a reference to the above libraries in your application as shown below:
Creating a Simple Dialog:
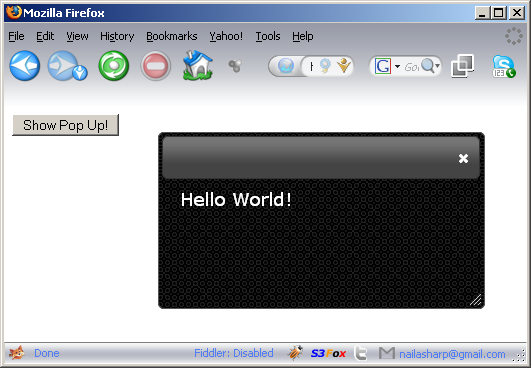
Let's start by creating a simple dialog using the JQuery UI. The dialog will display the greeting message to the user. Take a look at the following code:
There are couple of things to notice here! The line $("#dialog").dialog({autoOpen:false}); initializes the dialog. The autoOpen attribute is set to false which will prevent the dialog from opening when the page is loaded. The showPopup function is fired when the user clicks the Button. The dialog is shown below:
Don't freak out! You might see a different styled dialog box. If you don't like the custom default style then there are several others to choose from. You can download a different style/theme from the link below:
http://jqueryui.com/themeroller/#themeGallery
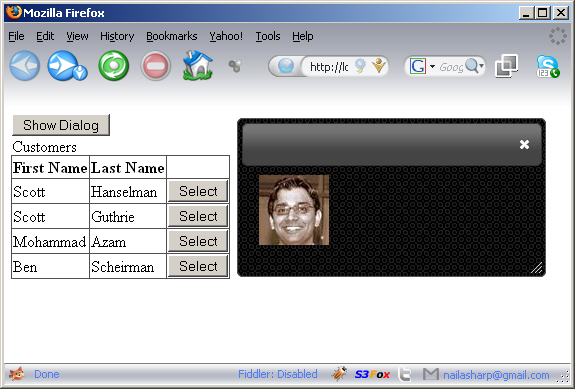
Dialog Boxes with GridView Control:
Let's use the dialog box feature with a GridView control. The GridView will be populated by a list of customers from the database. Here is the code which is used to populate the GridView control:
And here is the ASPX code for the GridView control:
There are couple of important things to notice about the above code. First, we are using a <DIV> control inside the ItemTemplate column. Each customer row have a unique <DIV> control which is associated with each row. This is performed by concatenating the keyword "dialogPicture" with the CustomerId. You can even make it unique using Container.ItemIndex which is unique for each row. Next, is that we have used a class "buttonClass" for the Button control. This is also for the same reason that we need to identify a particular button which cannot be achieved by using the id unless the id's are all unique.
The code above hooks up the Button click event and make the dialog visibile. There are several ways to get the id of the dialog <DIV>. We have used siblings since it offer more flexibility by searching both the sides of the TreeNode. Below you can see the screenshot when a particular row is clicked in the GridView control.
Conclusion:
In this article we demonstrated how to use the JQuery UI Dialog plug in to create attractive dialogs. JQuery UI Dialogs can also be used to create MESH applications.
[Download Sample]