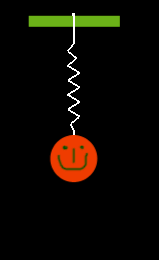
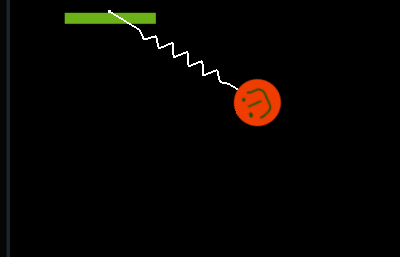
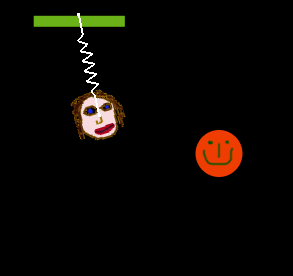
In the last article we introduced the concepts behind the SpaceManager framework. SpaceManager makes it easy to integrate physics effects to an iPhone application. In this article we are going to take a look at Spring and Slide effects which adds awesomeness to your iPhone application.


Joints:

There are many different kind of joints available in the SpaceManager framework. Joints enables two bodies to connect to each other. This connection can be created in many different ways since there are number of joints available in the SpaceManager framework. In the next section we are going to demonstrate how to create Spring and Slide joints between two bodies in space. 

Adding Spring Joint:

A Spring Joint connects two bodies together using a spring. Two bodies can be stationary objects, moving objects or combination of both. The following implementation joins a stationary object rectangle to a movable ball object.

01-(id) init
02{
03    if( (self=[super init])) {
04         
05        isTouchEnabled = YES;
06         
07            // insert code here
08     
09         
10        smgr = [[SpaceManager alloc] init];
11        [smgr addWindowContainmentWithFriction:1.0 elasticity:1.0 inset:cpvzero];
12         
13        cpShape *ball = [smgr addCircleAt:ccp(100,100) mass:25 radius:20];
14        ballSprite = [cpCCSprite spriteWithShape:ball file:@"smiley.png"];
15         
16         
17         
18        rectangle = [smgr addRectAt:ccp(100,300) mass:STATIC_MASS width:100 height:10 rotation:0];
19        block = [cpCCSprite spriteWithShape:rectangle file:@"block1.png"];
20         
21         
22        joint = [smgr addSpringToBody:ballSprite.shape->body fromBody:block.shape->body restLength:5.0f stiffness:15.0f damping:0.0f];
23         
24         
25        jointNode = [cpConstraintNode nodeWithConstraint:joint];
26        jointNode.color = ccWHITE;
27        jointNode.lineWidth = 2.0f;
28         
29         
30        [self addChild:block];
31        [self addChild:jointNode];
32        [self addChild:ballSprite];
33 
34        [smgr start];
35         
36    }
37     
38    return self;
39}
  

Most of the code is same as in the previous article with the exception of a joint. The joint makes it possible to attach two bodies together. The addSpringToBody method attaches a spring from the ballSprite to the block. Make sure to attach the spring to the shape property of the body and not the sprite itself. The stiffness and restLength attributes further specifies how the spring will behave in space. A new cpConstraintNode instance is created to which the joint is assigned. Finally, we add the cpConstraintNode (jointNode) to the space. The result is shown below:


Currently, the only force of nature applying to our bodies in space is gravitational pull acting downwards. This force will cause the spring movement. We can however apply additional forces as shown in the implementation below:

1- (BOOL)ccTouchesBegan:(NSSet *)touches withEvent:(UIEvent *)event
2{
3    CGPoint pt = [self convertTouchToNodeSpace:[touches anyObject]];
4    CGPoint forceVect = ccpSub(pt, ballSprite.position);
5     
6    [ballSprite applyImpulse:ccpMult(forceVect, 100)];
7     
8    return YES;
9}


Now, a force is applied where ever we touch the iPhone screen. The result is shown in the screenshot below:


Adding Slide Joint:

A slide joint can be considered a connection between two bodies where the length can be stretched to a maximum and a minimum. The implementation below shows the slide joint in action. 

01-(id) init
02{
03    if( (self=[super init])) {
04         
05        isTouchEnabled = YES;
06         
07            // insert code here
08         
09         
10         
11        smgr = [[SpaceManager alloc] init];
12        [smgr addWindowContainmentWithFriction:1.0 elasticity:1.0 inset:cpvzero];
13         
14        cpShape *ball = [smgr addCircleAt:ccp(100,100) mass:25 radius:20];
15        ballSprite = [cpCCSprite spriteWithShape:ball file:@"smiley.png"];
16         
17        cpShape *ball2 = [smgr addCircleAt:ccp(300,100) mass:25 radius:20];
18        cpCCSprite *ballSprite2 = [cpCCSprite spriteWithShape:ball2 file:@"smiley.png"];
19         
20        rectangle = [smgr addRectAt:ccp(100,300) mass:STATIC_MASS width:100 height:10 rotation:0];
21        block = [cpCCSprite spriteWithShape:rectangle file:@"block1.png"];
22         
23         
24         
25        joint = [smgr addSlideToBody:ballSprite.shape->body fromBody:ballSprite2.shape->body minLength:100 maxLength:200];   
26         
27        jointNode = [cpConstraintNode nodeWithConstraint:joint];
28        jointNode.color = ccWHITE;
29        jointNode.lineWidth = 2.0f;
30         
31         
32        [self addChild:block];
33        [self addChild:ballSprite2];
34        [self addChild:jointNode];
35        [self addChild:ballSprite];
36 
37        [smgr start];
38         
39    }
40     
41    return self;
42}


The implementation above indicates that the minLength between the two bodies participating in slide joint is 100 and the maxLength is 200. The effect is shown in the screenshow below:


Removing Joints:

There are situations where you want to dynamically remove a joint between the two bodies. When one body is removed from the joint another body must be added to accommodate the joint. In other words a joint must be connected at both the ends. The following code is invoked when the user touches a button (ball) on the screen.

01-(void) unleash:(CCMenuItem *) item
02{
03     
04    cpShape *shape = [smgr addCircleAt:ccp(100,100) mass:25 radius:25];
05    cpCCSprite *man = [cpCCSprite spriteWithShape:shape file:@"face.png"];
06 
07    [smgr removeAndFreeConstraint:joint];
08     
09    joint = [smgr addSpringToBody:man.shape->body fromBody:block.shape->body restLength:5.0f stiffness:15.0f damping:0.0f];
10     
11    jointNode = [cpConstraintNode nodeWithConstraint:joint];
12    jointNode.color = ccWHITE;
13    jointNode.lineWidth = 2.0f;
14     
15    [self addChild:man];
16    [self addChild:jointNode];
17}
   

As you can see the removeAndFreeConstraint is fired which removes the joint between the two objects. Next, we connect a different sprite to the joint and then add the new jointNode to the space. The result is shown below:


Looks kinda scary right!

Conclusion:

In this article we demonstrated how to get started with joints in SpaceManager library. Joints adds more interactivity to the application. In the next article we are going to take a look at the Particle system provided by Cocos2d framework.

[Download Sample