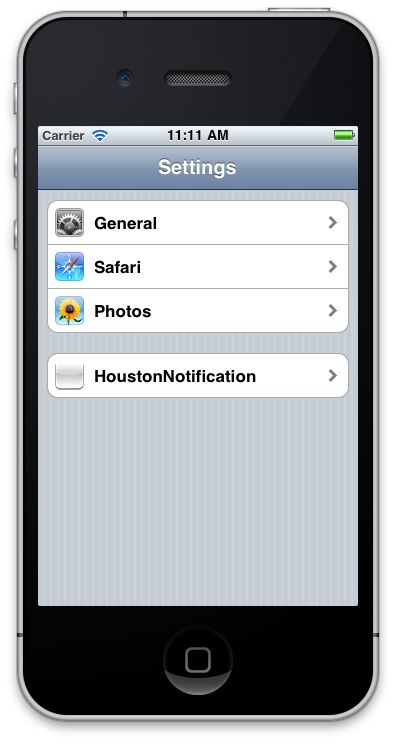
iOS applications allows the users to move their configurable clutter into the Settings area which can be easily accessed using the Setting icon on the iPhone screen. In this article we are going to create our own custom settings area where users are allowed to change application configuration.
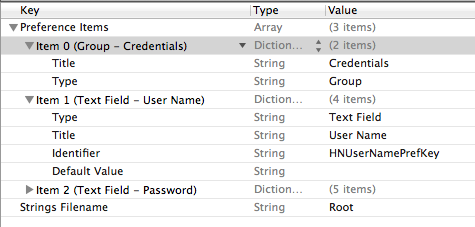
PreferenceSpecifiers
Title
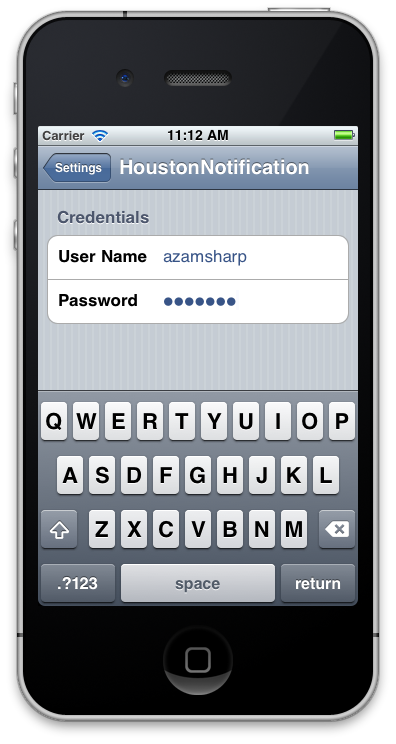
Credentials
Type
PSGroupSpecifier
Type
PSTextFieldSpecifier
Title
User Name
Key
HNUserNamePrefKey
DefaultValue
Type
PSTextFieldSpecifier
Title
Password
Key
HNPasswordPrefKey
DefaultValue
IsSecure
true
StringsTable
Root
            Title
            Credentials
            Type
            PSGroupSpecifier
            Type
            PSTextFieldSpecifier
            Title
            User Name
            Key
            HNUserNamePrefKey
            DefaultValue
+(void) initialize
{
    // register defaults

    NSString *path = [[NSBundle mainBundle] bundlePath];
    NSString *pListPath = [path stringByAppendingPathComponent:@"Settings.bundle/Root.plist"];
    NSDictionary *pList = [NSDictionary dictionaryWithContentsOfFile:pListPath];

    NSMutableArray *prefsArray = [pList objectForKey:@"PreferenceSpecifiers"];
    NSMutableDictionary *regDictionary = [NSMutableDictionary dictionary];

    for(NSDictionary *dict in prefsArray)
    {
        NSString *key = [dict objectForKey:@"Key"];

        if(key)
        {
            id value = [dict objectForKey:@"DefaultValue"];
            [regDictionary setObject:value forKey:key];
        }

    }

    [[NSUserDefaults standardUserDefaults] registerDefaults:regDictionary];

}
- (BOOL)application:(UIApplication *)application didFinishLaunchingWithOptions:(NSDictionary *)launchOptions
{
    NSUserDefaults *ud = [NSUserDefaults standardUserDefaults];

    NSString *username = [ud stringForKey:@"HNUserNamePrefKey"];
    NSLog(@"%@",username);

    NSString *password = [ud stringForKey:@"HNPasswordPrefKey"];
    NSLog(@"%@",password);

    // Override point for customization after application launch.

    self.taskViewController = [[TaskViewController alloc] init];

    _viewController = [[BakerNotificationViewController alloc] init];

    self.window.rootViewController = _viewController;
    [self.window makeKeyAndVisible];
    return YES;
}
 // register change notifications
    [[NSNotificationCenter defaultCenter] addObserverForName:NSUserDefaultsDidChangeNotification object:nil queue:nil usingBlock:^(NSNotification *note)
     {
         // get the user name and password and authenticate the user

         NSLog(@"settings changed!");
     }
     ];