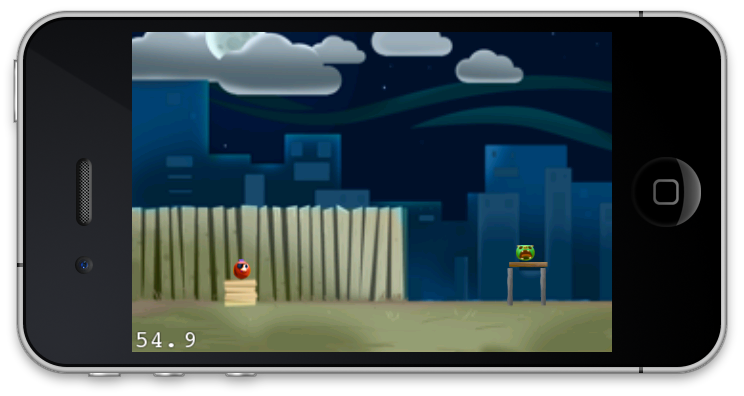
Physics enabled games quite often make their way on the top of the charts. There are number of reasons of the success of physics enabled games but the two most common reasons include number of levels and the direct relationship between humans and the physical forces of nature. Humans can easily relate games when they are based on the forces that we experience everyday. In this multi-part series we will implement a clone of Angry Birds called “Ghetto Birds”.

Setup:

Before diving into code let’s discuss the tools we will be using for the implementation.

1) Cocos2d Framework
2) Kobold2d
3) LevelHelper
4) SpriteHelper
5) Box2d

The only thing you can substitute is Kobold2d although we prefer Kobold2d since it automatically references the latest versions of number of libraries but you can always use the Cocos2d project template for Box2d applications.

LevelHelper and SpriteHelper are paid products that can be downloaded from the Apple App store.

Packaging the Sprites Using SpriteHelper:

SpriteHelper is an awesome tool which helps you to package all the sprites which can later be used by the LevelHelper application. Apart from packaging the sprites SpriteHelper also enables the physics behavior on the sprites, it allows to draw custom polygons which resemble the sprite shape etc.

After downloading the SpriteHelper from the Mac app store open it and you will see the following screen.


This is the designer screen of the SpriteHelper application. Use the “Import Image” option to import all the sprites into the designer. The Import Image option is shown in the screenshot below:


Select all the images you want to use in your application and they will appear in the SpriteHelper as shown in the screenshot below:


At this point you can change the physical properties of the images. You can also trace an outline on the images which changes their body structure and how they behave in the Box2d world.

NOTE: The physical properties of the sprite can also be changed by using LevelHelper. 

Finally save the SpriteHelper file in the “Resources” folder of your project. You will also notice that the SpriteHelper created number of sprite sheet images. These sprite sheets are generated for the iPhone, iPhone (Retina) and iPad devices. In the next section we are going to load the SpriteHelper files into the LevelHelper and start developing our level.

Implementing Level Using LevelHelper:

Open LevelHelper and using the File menu select “New Project”. This will present you with a project dialog box as shown in the screenshot below:


Type the project name “GhettoBirds”. Instead of a universal application we are going to select iPhone in landscape mode. The field “Path to project” represents the project folder path. When all the fields are entered press the “Create New Project” button. LevelHelper will automatically fetches all the sprites from the “Resources” folder and will display it in the right pane as shown in the screenshot below:


There is a small glitch in LevelHelper where it does not load the sprites automatically. In that case click the project button as shown in the screenshot below:


If the LevelHelper still do not show the sprites then make sure you have saved them in the correct folder.

Once, the sprites are loaded in the right pane you are ready to create your level. Go crazy and create the level of your dreams. We have started with a very simple level which consists of the bird, pig and a platform as shown below:


The great thing about LevelHelper is that you can test your level directly from inside the LevelHelper. Use the “Scene Tester” button to run your level. If you do not have “Scene Tester” installed then you will get a prompt to download the screen tester or you can download the scene tester using the following link:

Screen Tester for LevelHelper

Loading Level in your xCode Project:

Everything is fine and dandy but we have still not loaded the level in our xCode project. Save your level as “Level1” from inside the LevelHelper project. Add the “Level1” file in your project resources folder. Next, you need to generate the code through LevelHelper. This code will consist of new sprite classes and helpers to load your level in your Cocos2d application. Take a look at the screenshot below which shows how to generate code using LevelHelper.


Save your code in a folder called “LevelHelper” and then add that folder into your Cocos2d project. The screenshot below shows all the files you need to add to your Cocos2d application.


At this point you can sit back and tap your self on the back! Now, you are ready to write some code and load the awesome level you created using LevelHelper. Add a new Objective-C file and name it “GameLayer”. Be sure to change the extension of the GameLayer.m to GameLayer.mm. If you do not rename it to use the .mm extension then Box2d will not be able to work.

The implementation of the GameLayer.h is shown below:


LevelHelperLoader class contains methods to load sprites, collision detection etc. LHSprite is an extension on the CCSprite class and consists of helper methods which includes enabling and disabling physical properties etc.

The implementation below shows how to load the “Level1” in our Cocos2d project:


There are few methods that the Kobold2d project template adds by default. These methods are also available if you use the Cocos2d project template instead of the Kobold2d template. These methods include the “tick” and “step” method. The complete implementation will be available in the source code. Run the application and you will notice that your level is loaded in the iPhone simulator through xCode.

Now, open the LevelHelper again and change the bird “Object Type” property to dynamic. Also, make sure that the “Handled by SpriteHelper” checkbox is unchecked. Save the level and run it again using xCode. You will notice that now the bird will drop on the ground.


NOTE: When you change the design of the level you do not have to generate the level helper code again. The only time you will generate the code again is what you add tags to the sprites. Tags will be covered in the next tutorial.


Download Source Code:

The complete source code is available on Github. You can subscribe to the Github repository using the link below:

https://github.com/azamsharp/Ghetto-Birds

Conclusion:

In this article we learned how to use the LevelHelper and SpriteHelper to make a clone of Angry Birds called “Ghetto Birds”. In the next article we will demonstrate how to launch the bird and then perform collision detection between the bird and the pig.