Creating Physics Enabled Game Using Cocos2d and SpaceManager Part 2
In the last part we started implementing a physics enabled iPhone game similar to Bubble Ball. In this article we are going to move forward with our implementation and also change some of the design aspects of our game.
Design Revised:
In the first part we allowed the user to move the ball anywhere on the screen. This really does not make any sense since the user can simply drag the ball onto the finish line and complete the level. We have revised the design of the game to limit the user from moving the ball. Now, the user can only move the blocks which will be used to complete the pathway to the destination.
Adding the Bridge Support:
Bridge represents the block that can be moved by the user to allow the ball to reach its destination. We have exposed the bridge using a property in the GameLayer.h file as shown below:
The property is initialized in the GameLayer.m file as shown below:
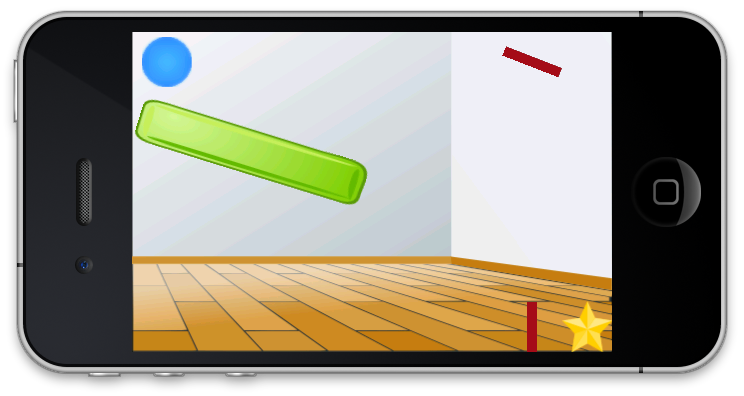
The bridgeShape is rotated at an angle of 1.2 radians. This will allow the ball to bounce on the bridge and then reach the destination. The screenshot below shows the effect:
The bridge is located on the top right hand corner of the screen.
Moving the Bridge:
As discussed in the design revision we will be moving the bridge instead of the ball. In the previous article this was achieved by converting the object from static mass to movable entity. The problem with that approach was that once the static mass is converted into the movable entity the ball was not able to recognized the new objects in the space. This means that the ball would just pass through the object as it does not exist.
There are multiple ways to solve this problem. One way is to call the rehashStaticShapes method of the SpaceManager class. This will refresh the space and the ball will be able to recognize the new objects and their new positions. The other way and the preferred way is to set the spaceManager property of the ccCpSprite to the space manager instance as shown below:
The effect is shown below:
Future Enhancements:
After reading part 1 and 2 you must have realized that the most painful aspect of creating a multi-level physics game is the creation of the level itself. We almost wrote 20-30 lines of code just to make a very simple level. In the next part we will use a tool called LevelHelper along with SpriteHelper to make levels for our game.
Question for Readers:
We are having a hard time naming this game! Can you suggest a good name for this game?
Conclusion:
In this article we revisited the design of our game and made necessary changes. In the next article we will demonstrate how to use LevelHelper to create a level for our game.