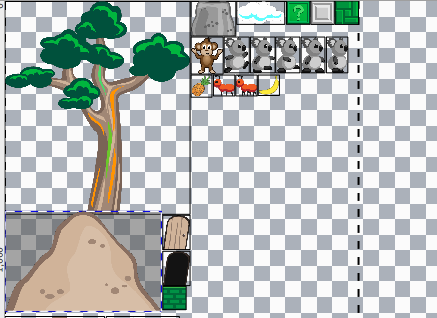
In the last article we started implementing our crazy Kraazy Koala game. We created our level in the awesome LevelHelper and used SneakyInput to control our koala. In this part we are going to demonstrate how to add animations and perform jump and attack actions for our koala.
NOTE: In the last part we started with an iPhone application but we quickly realized that iPhone might be too small of a device for such an amazing game. We quickly changed the application to iPad.

Update Supporting Code:

If you have recently downloaded LevelHelper then we highly recommend that you update the supporting code. This will make sure that the generated code is the latest and you will not run into bugs. Hopefully, this feature will be more visible in the future versions of the LevelHelper. Currently, LevelHelper does not prompt you to download the updated version of supporting code. This leads to inconsistency in the application which results in non-traceable bugs and errors.

Creating Animations in SpriteHelper:

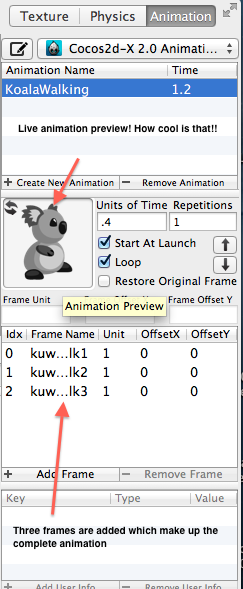
SpriteHelper makes it super easy to create animations. All you need to do is to select the frames which you want to be part of the animation and the SpriteHelper does the rest. Open your SpriteHelper scene using the SpriteHelper tool and then select the animation tab. Create a new animation with the name "KoalaWalking" and add frames to the animation. You can move the frames up or down based on the required animation. The cool thing about SpriteHelper is that it shows a preview of the animation as you add the frames to the animation. Check out the screenshot below:


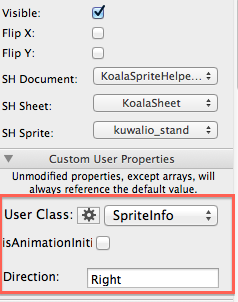
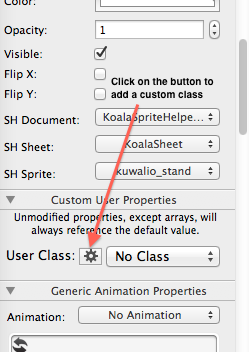
We are done with creating animations but we still need to check if the koala is moving right or left. This is accomplished by exposing a property on the koala object using the custom class feature provided by LevelHelper. Open LevelHelper and select koala. In the properties section click on "User Class" as shown in the screenshot below:


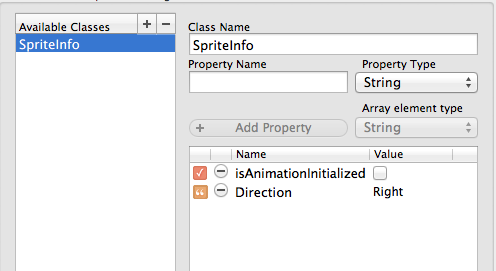
The next screen will allow you to add TAGS and Custom classes to the object. In the custom classes section (right pane) add a new class called "SpriteInfo". Add two properties to the SpriteInfo object. The direction property is a string property which represents the current direction of the koala. The isAnimationInitialized property is used to initialize the animation.


Make sure you save it and then set
the new "SpriteInfo" as the custom class for the koala as shown in the screenshot below:


At this point we have everything setup and we are ready to use the animations. Locate the tick method inside xCode and implement the following code:


The check for isAnimationInitialized is necessary since we don't want to initialize the animation every time. The direction property is set on the basis of which direction joystick is being pulled.

Run the application and use the joystick to move the koala left or right. You will notice that now the koala is not sliding but moving with an animation. This is where LevelHelper and SpriteHelper truly shows the power and simplicity.

Jump and Attack:

In the last tutorial we added jump and attack buttons using SneakyInput framework and now we are going to utilize them. The jump function is quite similar to the moving function and it is implemented below:


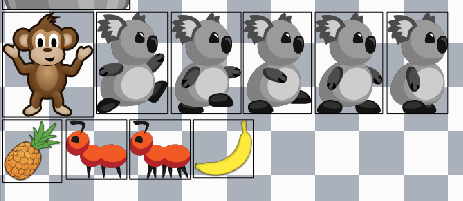
You can also put the above code inside the joystick method which will make sure that the koala jumps when moving. The next part is to tackle the attack button. The attack button will allow the koala to throw pineapples. Our sprite sheet already contains the sprite for pineapple as shown in the screenshot below:


Instead of adding the pineapple sprite to the level and then making it invisible we are directly going to load the sprite from the SpriteHelper file. This will keep our level file clean from sprites which are not part of the actual level.


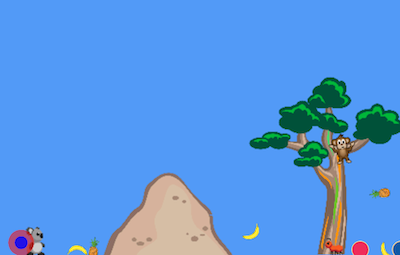
The screenshot below shows the koala throwing pineapples in action.


You might notice that the koala sometimes backup when the pineapple is launch. This is because of the reaction caused by launching the pineapple. You can increase the value of the koala density to make it is little less volatile.  

SpriteHelper Auto-Trace Feature:

There are scenarios where your sprite does not represent a normal rectangle or circle. Even our koala does not fall under these two shapes. SpriteHelper provides an easy way to auto-trace a shape in the form of polygons. The auto-trace will trace an outline around your sprite. You can adjust the points by either using a slider or by providing a custom shape. In this section we are going to create a shape for a small hill that is part of the level.

Open the SpriteHelper and select the hill as shown below:


On the right hand side pane select the "Physics" tab and click on the "Create New Auto Trace Shape". This will magically create an outline for your sprite which in this case it a hill. Select the newly created fixture, set it as static and use the optimize fixture to create just the necessary points. Save the SpriteHelper file and that's it!

Open the LevelHelper and drag the hill sprite from the sprites to your level and you will notice that it has a new shape attached to it. You can easily test it out by dropping a koala or a pineapple on top of the hill and witness if the hill behaves as a hill or a rectangle.

What's Next:

If you have been paying close attention then you might have noticed a monkey swinging from the tree. The monkey is koala's enemy and is attacking the koala by throwing bananas. In the next article we are going to implement the epic battle between the kraazy koala and the psycho monkey.

Conclusion:

In this article we learned how to implement animation using SpriteHelper. We also learned how to auto-trace the objects and give them more realistic feel. In the next article we are going to introduce koala's nemesis, monkey.