Creating Physics Enabled Game Using Cocos2d, LevelHelper and SpriteHelper
In the last two articles we discussed how to get started with making a physics enabled game using Cocos2d and SpaceManager framework. In this article we are going to recreate our app and use LevelHelper and SpriteHelper.
Recommended Reading:
It is highly recommended that you read the first two articles of this series. The articles demonstrate the use of the SpaceManager framework to enabled physics effects for your Cocos2d game.
SpaceManager is awesome and it really makes building physics game easy. Unfortunately, the only downside is that it does not have a designer to create levels. As, demonstrated in the previous articles creating levels using Cocos2d and SpaceManager requires a lot of code. Consider writing a game with 10 levels this means you will be writing at least 200-300 lines of code just to create a level.
What is LevelHelper?
LevelHelper is a Mac OS application created by Vladu Bogdan which helps developers to write levels for their iOS applications. The levels are written by using the designer of the LevelHelper tool. LevelHelper uses regular images which are loaded in the designer using the SpriteHelper tool. When the user is finished designing the level he/she can export the level to Objective C code which can be used in an iOS application.
Getting Started with LevelHelper and SpriteHelper:
LevelHelper and SpriteHelper are available in the Mac App store for a very decent price. You can follow the links below to buy and download the tools:
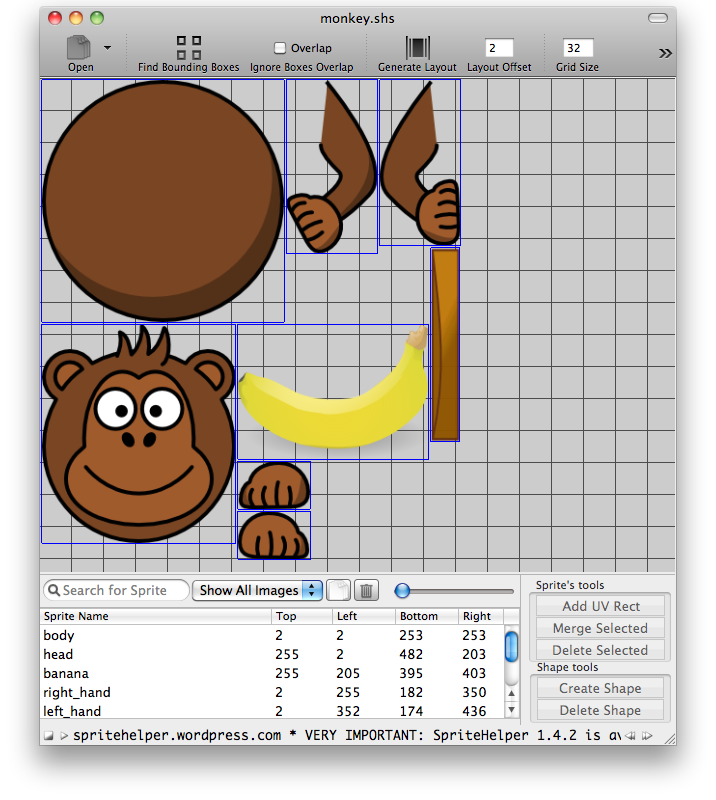
After installing both the products, open SpriteHelper and import some images into it. The screenshot below shows some images added to the SpriteHelper.
When you save the SpriteHelper project it will produce two files. One will be a png file and the other will be .shs file. The .shs file will be fed into the LevelHelper to load all the images.
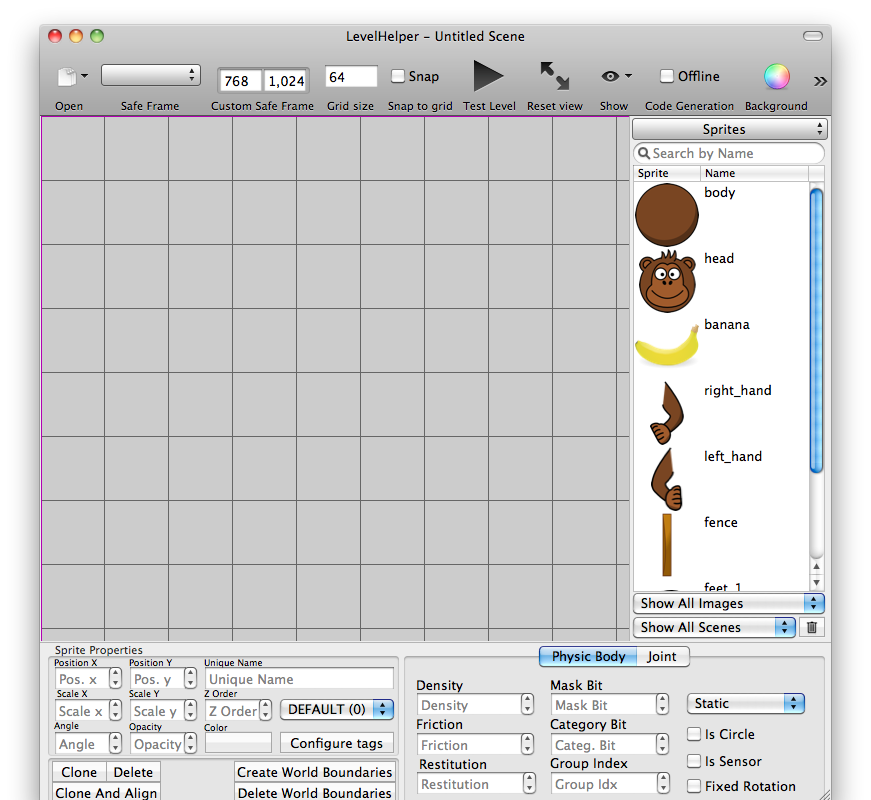
Now, open LevelHelper and import the .shs file. All the images contained in the SpriteHelper file will be loaded on the right hand pane as shown in the screenshot below:
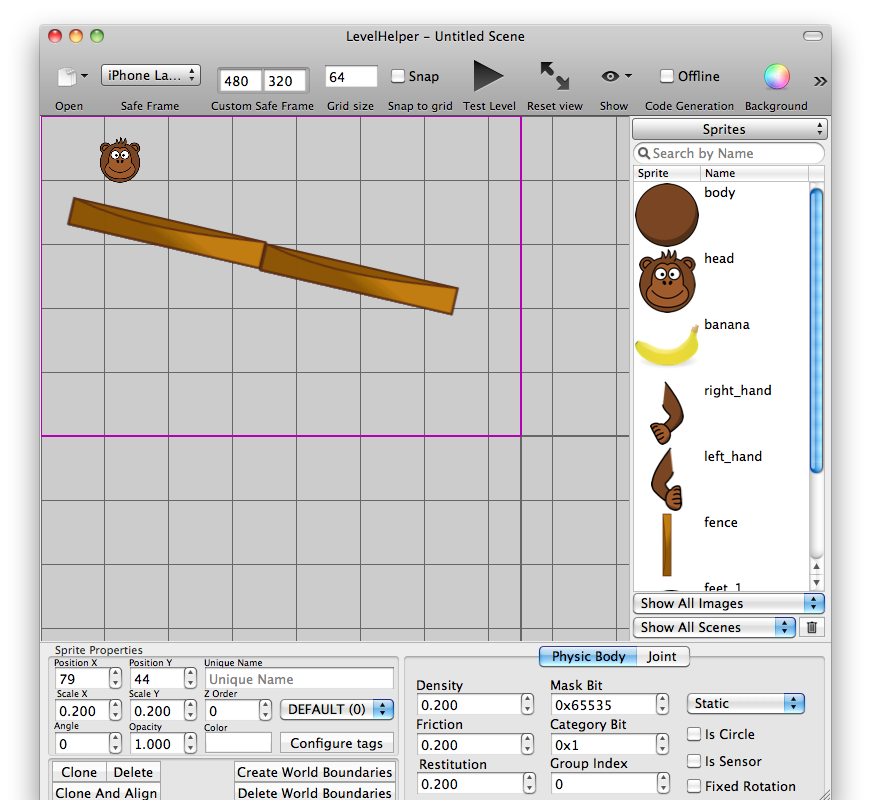
You are ready to start making your awesome level! Simply start dragging and dropping the sprites from the right hand pane into your designer. The Safe Frame option in the LevelHelper allows to set boundaries for iPhone and iPad devices with portrait and landscape modes. For this example we are going to set the safe frame to fit iPhone in a landscape mode. The screenshot below shows a very simple level which includes a monkey head and a ramp.
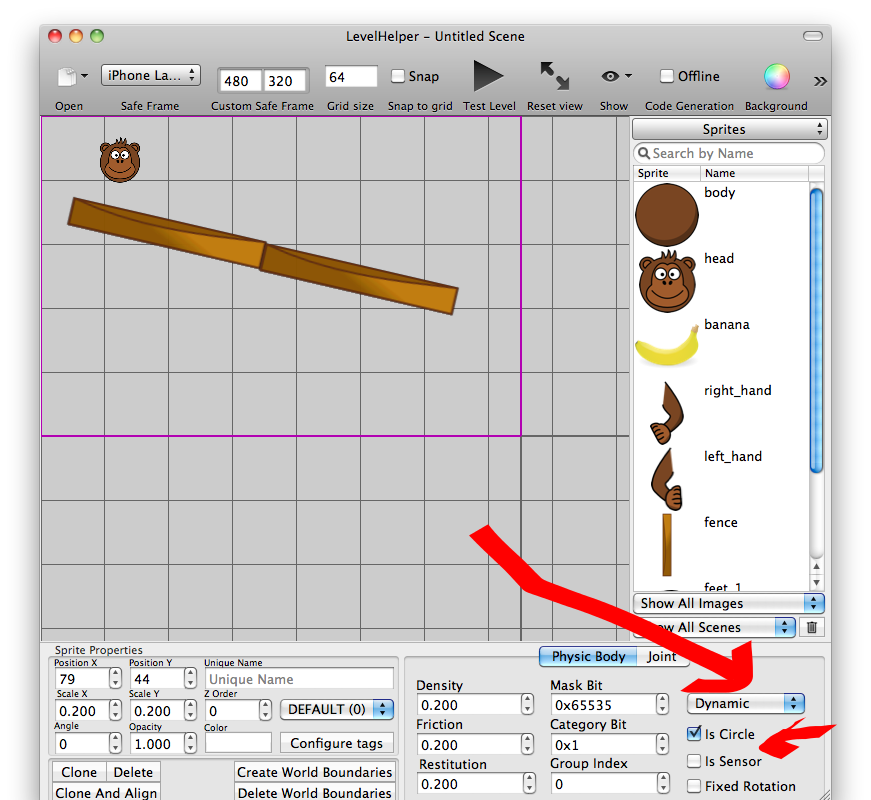
Select the monkey head and change its property from Static to Dynamic. Also, check the box Is Circle since the monkey head shape represents the circle shape. Take a look at the screenshot below:
For this article we are using BETA version of the LevelHelper which allows us to test the level from right inside the LevelHelper using the Test Level button. Isn't that awesome!! The version available on the Mac App store currently might not have this feature enabled.
Using LevelHelper with Cocos2d Box2d Project:
Create a new Cocos2d Box2d project. Next, save the LevelHelper file as "level1.plhs". Now, inside LevelHelper click on the File and then select "Generate Code For" and then Cocos2d (Obj C) with Box2d. Give the path to the classes directory for your project. Place the "level1.plhs" and the image generated from the SpriteHelper inside the "Resources" folder of your application.
The next step is to load the level from inside the xCode. The following two lines are added inside the init method to load the level.
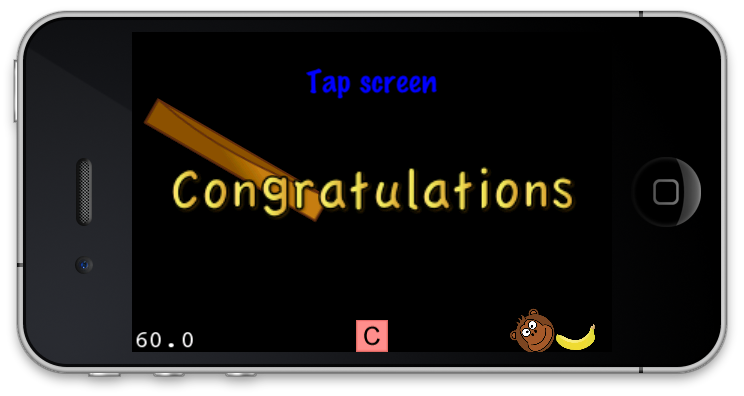
Run your application and the level will be loaded and the monkey head will start rolling down the ramp. At this point add a banana to the LevelHelper design view. In the next section we are going to add collision detection to our little game. This collision will be between the monkey and the banana.
Collision Detection:
The collision detection will be performed inside the tick method which is fired at regular intervals. The head variable contains the reference to the b2Body and the banana variable contains the reference to the banana object. The references are extracted using the following implementation:
The collision detection code is shown below:
If the collision is detected a label is on the screen and animated. The screenshot below shows the result:
Awesome Customer Support:
LevelHelper customer support has been outstanding! Vladu Bogdan, the author of LevelHelper and SpriteHelper has responded to all of the questions and is always looking for feedback from customers to improve the tools.
Conclusion:
In this article we introduced LevelHelper and SpriteHelper for making physics enabled games. LevelHelper along with the SpriteHelper makes it tremendously easy to make levels for the iOS game.